
Workshop and Training Resources and Videos
Training resources for personal and professional development.
-
Canvas and Canvas Plug-in Videos
- Please don't do the 'image shortcut' (i.e., saving your pdf as a JPEG / taking a screenshot of it and then pasting that image into your email) This breaks all of your hyperlinks/makes the links un-clickable, and it also makes the PDF inaccessible.
- Insert it as an Object (Instructions below)
- Put your cursor at the spot in the email where you'd like your PDF to go.
- Click on the Insert tab
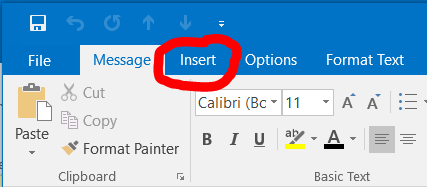
- Click on the Object (it's on the right-hand side of the ribbon)
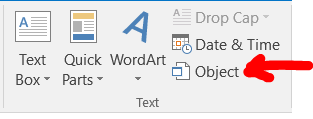
*** If for some reason, it won’t let you click on the Object button (i.e, if all the choices are grayed out), your cursor is probably in the wrong spot ;) Make sure that your cursor is in the body of the email before you click the Insert tab.
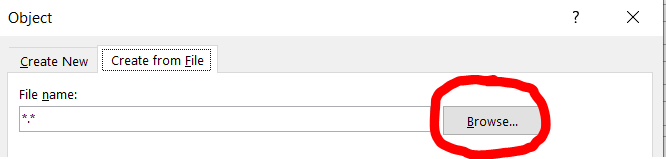
- Select the “Create from File” tab
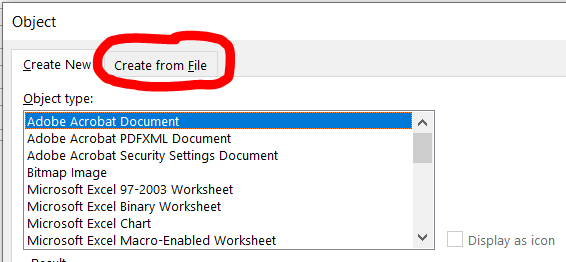
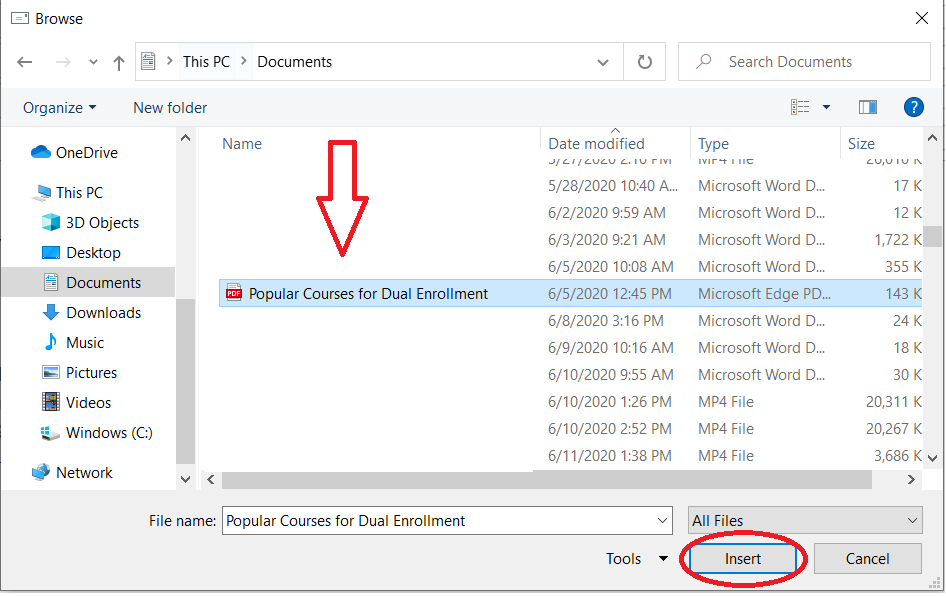
- Click Browse
- Click on the name of the file you would like to insert
- Click Insert
- The name of your file will now appear in the field next to the Browse button. Click
OK

- The PDF should now appear inside the body of your email
Here’s what that Dual Enrollment flyer looks like once it’s been inserted as an object
inside my message: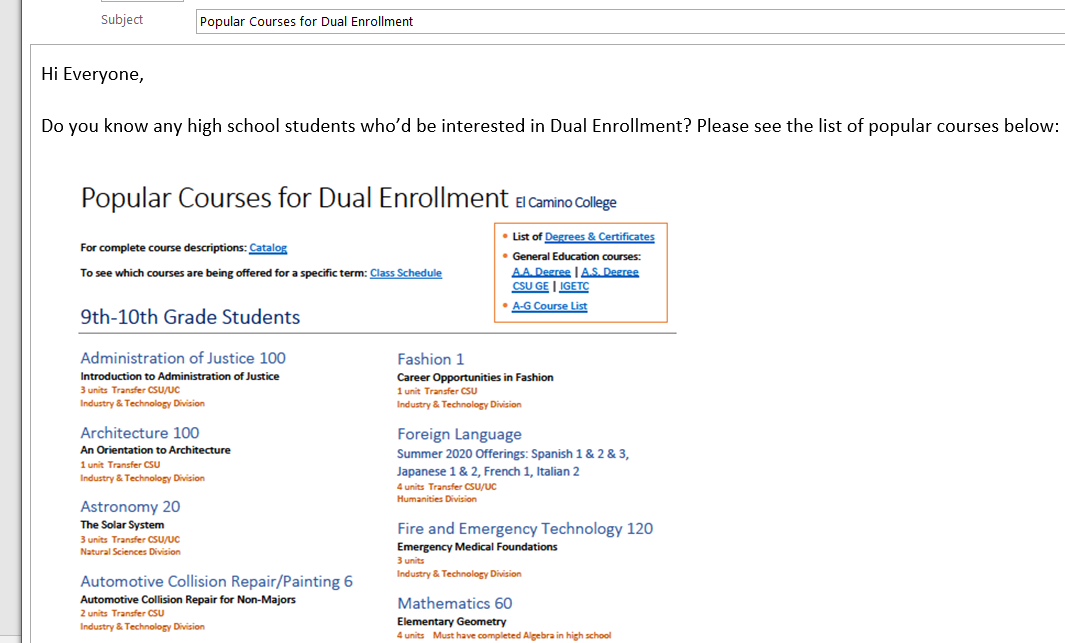
If it looks too small, you can resize it. (Optional)
- Click on the PDF to select it. A dotted outline will appear around it.

- Click & drag on one of the corner tiny black boxes to make the PDF bigger.
When you're emailing fellow ECC employees and/or students, sending them a link to a file can be a great alternative to attaching it
Why?
- You can send any sized document you want without running into email attachment limitations
- It protects confidential information
- Or you’re worried that someone may accidentally forward an email with a confidential attachment?
A great solution is Sending a Link to your file(s) instead:
**OneDrive gives you a bunch of different options for sharing files. Some are better
for different levels privacy you might need + how many people you need to share the
file with.
This demo will show you one of the most common ways of sharing. At the end of this
doc, I'll briefly go over some of the differences between the options so you can pick
which style works best for you
In this example, I'll share a file called “Sample Report” with my co-workers Tuan & Jackie. (This example is for a non-confidential file. Later I’ll show you how to send a confidential one.)
- Upload the file to your OneDrive account
On the entry for the file, find the Sharing column (right side of screen.) - Click the word Private. (Your uploaded files start off private by default)

- This brings up the sharing window. Double-check that the file name in the upper left of this window matches the name of the document you want to share with people. (It’s possible to disable the sharing link if you made a mistake and shared the wrong file-- but it’s better to not have to do that.)
- Click Share

- A window will pop up where the default setting is to give your recipients Editing privileges. But you can change this.
In this example, I just want to share my document with Tuan and Jackie. I want them to read it, but I don’t want them to be able to edit the original. (Basically, the same as if I were attaching the file to an email.) So in the next steps, I’m going to change that permission settings.
- In that sharing pop-up, click on the sentence “People you specify can edit.”

- First, uncheck the box next to “Allow editing”

- Here’s what it’ll look like once you’ve unchecked the box. It now gives you the option
to block the file from being downloaded, if you’d like.

This way, Jackie & Tuan can't edit my original file. They could technically download a copy and start editing it, but they'd only be editing that new version on their own computer. The original wouldn't change.
**If I wanted them to be able to edit the original, like if it's for a project we're all working on together, then I would just leave that box checked. That would make the file like a Google doc.
- Now I have to choose how I want to share this file with them. Since this isn’t a confidential document, I’ll go with the easiest option – I’ll click on “People at @elcamino.edu with the link.” (At the bottom, I’ll go over why I chose this one, and what each choice means.)

- Click Apply
A new pop-up will appear. Notice how it now says people with the link can view the document (rather than edit it.)
I have a few choices on this screen. I can either type in Tuan & Jackie’s names on
the To: line, or I can get a link that I can send to them.
For this example, I’ll click Copy link (lower left)
- In the pop-up that appears, click Copy

Now I have a link copied to my clipboard that I can send to Tuan and Jackie
Q: “Why didn't you choose the option to type in their names? Wouldn't that have been
faster?”
A: Yup, that can be faster if it's shared with only a few people. But sometimes you
know you'll need to share the file with more folks later on. (Ex: A doc about the Tenure Reception room set-up that we’re later going to send to the
Faculty Development Committee.) It'd take a long time to type in all the names of
everybody on the committee one by one, so it's often easier to just get a link that
I can pop into a group email.
Letting Recipients Edit
Being able to collaborate on a file is one of the really neat features of Office 365 :) It's like having a Google doc, but with a whole lot more tools.
When you share a file for collaboration, there are a few tips I’d recommend:
Make a copy of the original document, that doesn't get shared. (Ex: “Sample Report - orig.docx”)
Turn on the setting “Open in review mode only”. That way, everybody can see what changes were made to the original, and by whom.
People can also easily leave comments & ask questions.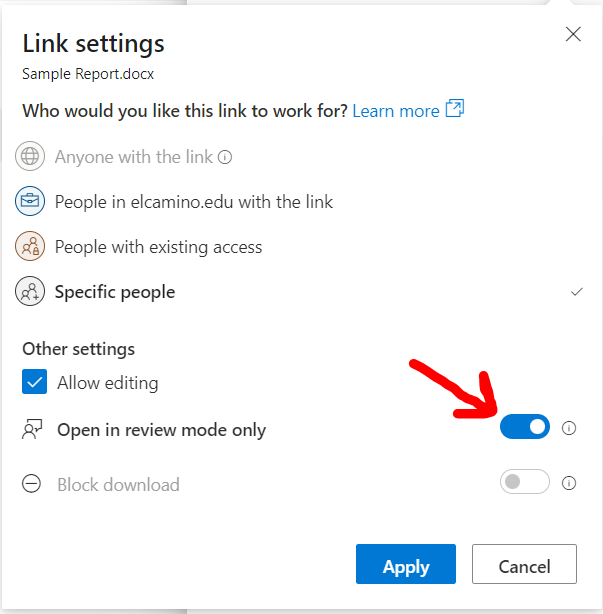
Choose the setting for “Specific people,” and then type in the names of the people who you’ll allow to edit the file. (See pictures below)
Yes, it’ll take more time to type in everybody's name individually (rather than the ‘creating a link’ method.) But it gives you control over who can make changes to the file. (Because otherwise, anybody who had the link could make changes.)
Ex: You share a link to your syllabus with a colleague for review, and he accidentally forwards your email to one of his classes. Since his students now have the sharing link, any of them can make whatever changes they want to your document. (ß This scenario can be avoided by using the ‘Specific People’ method.)
First, on the Link Settings pop up, select “Specific People” 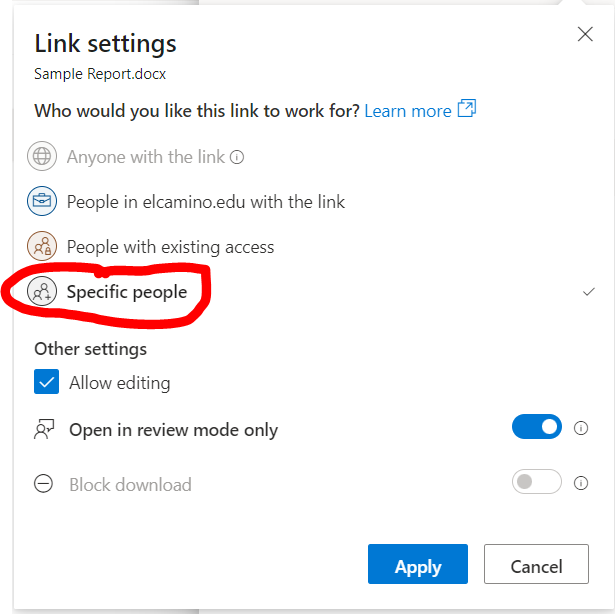
Click Apply
A new popup will appear where you can type in their name(s). (Their name will usually appear after typing only a few letters, and you can just
click on it.) 
Click Send. You’ll see another pop up letting you know that they've been sent a link* 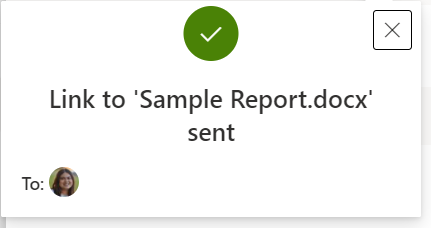
* Yes it's a link -- but it's a special kind that only works when those specific people you’ve named log in to their Office 365 account.
Ex: Let's say that Jackie and I are both Faculty members, and Jackie accidentally forwards that link to her class. Not a problem! Since I used the ‘Specific People’ method, that link will only work for Jackie.
Q: What if I want someone to edit my file and some people to only be able to read it?
A: That's totally fine – you can share the same document in multiple ways J Just click that Share button again, and go through all the steps for each type of group.
Ex: For this same document, I might share it so that our manager Dr. Martin can edit it in regular mode, Jackie can edit it but only in Review Mode, and Tuan can read it.
Confidential Files
Sharing a file through Office 365 can be more secure than emailing attachments. Emails
with attachments can get accidentally forwarded. But if you share the file using the
setting of “Specific people,” and the link gets accidentally forwarded, it won't work for someone that it wasn't
intended for. 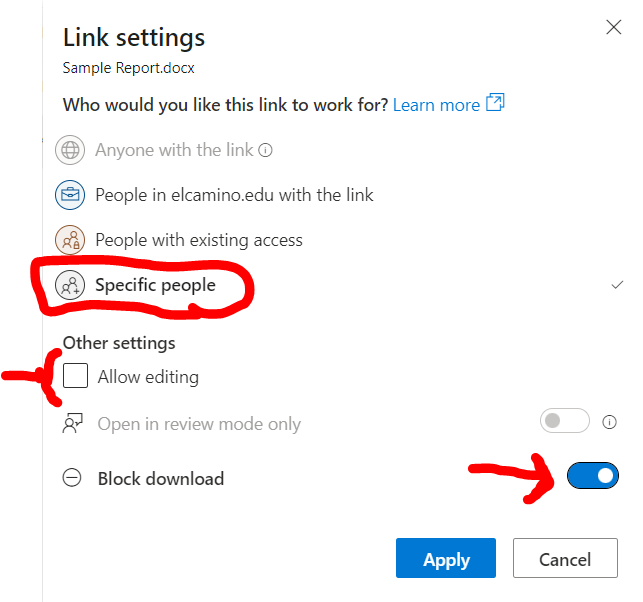
First, select “Specific people”
If applicable, you might also consider unchecking the box that allows people to edit the file. Taking away the ability to edit will allow you to toggle On the setting to block downloading.**
**Note: The ‘Block download’ setting is more of a speed bump than a full barrier. A person could still take a screenshot, use their phone to take a picture of the screen, etc.
Click Apply
A new popup will appear where you can type in the name(s) of the recipient(s). (Their name will usually appear after typing only a few letters,
and you can just click on it.) 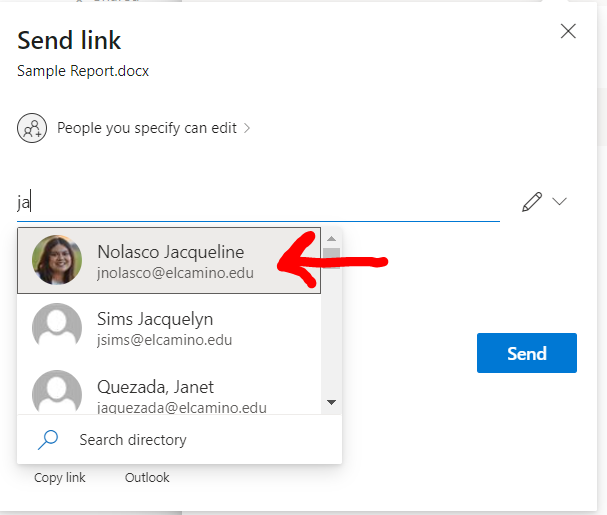
Click Send. You’ll see another pop up letting you know that they've been sent a link.